Search This Blog

Saturday, March 30, 2013

Summer Nail Color Swatches

I've been posting way too late in the day this past week, so I apologize and promise to get my tail in gear next week by prepping my blog posts at night in advance rather than spending the quiet time after my kids go to bed to write my post for the day.  But my eldest has been on spring break, and I guess I'm not so used to having both of the boys home with us during the day!  Little man has been at his worst when it comes to pestering his older brother, the novelty of having him home to play with quickly subdued by having to share mom and dad and the toys all day long now instead of just for a few hours before bed.  Tomorrow is Easter, and big guy goes back to school on Monday, so I'm hoping I can get my tail in gear!

On that note, Happy Easter to those of you who celebrate it!  Whether you're reading this Saturday night when I post it, or Sunday on the big day itself... or even Monday after celebrating with the family.  Whenever you read this, I hope that Easter was lovely for you! haha


I have been on a real nail kick this week.  I bought an at-home gel manicure set, about $125 in new polish colors (standard polish and gels), and I still shelled out the cash today for a professional pedicure at the local nail salon by Target.  There's just something about getting your feet rubbed by someone else, sitting in that massaging chair with your feet in the hot water... Ahhh.... even if the weather hasn't been cooperating most of this month, prepping my feet for sandal weather sure gets me in the mood for spring!  Plus, my tootsies need to be in top condition for trying on sandals this week. It's time to start shopping for warmer weather apparel!

Since I did a review of some of the Essie Spring Collection colors yesterday, I thought today I'd give my opinions on some of the new colors I've found that I plan on wearing this summer.  Some of those Essie colors did scream a little more summer (or maybe they were thinking spring break in Miami or Cabo) to me, so I put the rest of my summer colors on with the Essie ones.  I tend to gravitate towards blues and corals for summer, as it makes me think of the beach and the tropics in general.  So these were the colors I chose.  And of course a fun neon pink it totally summer!

I also want to say that the Milani coral in Flamin Race is a near perfect dupe for Essie Hip-Anema.  I put the two side by side so you can see.  I did throw on two pastel colors next the the Essie ones, too because I feel like pastels can easily transition into summer as well.  And of course the Pantone color of the year, a nice emerald by Maybelline Color Show.  It may be called tenacious teal, but it really doesn't have much blue to it at all.  (This did require about 4 coats though.  It's super sheer, so keep that in mind when applying it on yourself!)


In order, the colors are: (Brand, color name)

  1. Orly, Beach Cruiser (this photo doesn't do it justice, it's really a very 80's neon pink)
  2. Orly, Skinny Dip (one coat- it's very sheer)
  3. Orly, Skinny Dip (three coats- more like what it looks like in the bottle)
  4. Milani, Quick Teal
  5. Milani, Flaming Race (just a touch pinker than Essie's color, but darn close for half the price)
  6. Essie, Hip-Anema (slightly redder than the Milani color)
  7. L'Oreal, Lacey Lilac #119
  8. Maybelline Color Show, Green With Envy #320
  9. Maybelline Color Show, Tenacious Teal #330
I'm sorry for the low quality of images recently.  Since we are moving, all of my photography equipment is packed away right now, and I'm relegated to using my iPhone to capture shots of my swatches for now.  Since I can't focus on my own arm or nails (or anything up close really) without a macro lens, I'll probably end up picking up a point and shoot at Best Buy some time soon so I can really show off the colors to you better.

Update on the Essie polish I put on Thursday night- it's already majorly chipping! :(  Bummed out!  I think it's because my nails underneath are so brittle from wearing gels for the last few months, and I didn't put a good top coat on them either.  Any recommendations for an awesome topcoat?

Friday, March 29, 2013

Top Beauty Apps

Just about everybody has a Smartphone these days... or an iPad, or an iPod that's basically an iPhone (minus the phone calls!).  This past week I've been test driving some of the top beauty apps available.  (And by "top" I mean the top ones that showed up by relevancy when I typed in beauty.  Read below for why some of these don't earn top ratings in my book.)  Now, these were on my iPad, so they are from the iTunes store. Not sure their availability for Android phones or tablets, but you can check out my Winners below and see for yourself on your system.

I also learned that some of my top beauty magazines have online subscriptions for free I can easily add to my newstand in iTunes.  No more toting heavy magazines with me everywhere!  Yay!  But I can't exactly dog-ear the pages for reference though. :(


The Losers-

1. Modiface Makeover: 1 Star.  This app is supposed to allow you to test run different makeup products on a photo of your own face to see how they would look.  The concept is solid. You take a photo of your own face and then can do test swatches on your actual features with buyable makeup products.  However, what it has in theory it lacks in application.  The colors are really sheer, so it's hard to say for sure if that's how the pigmentation will really look on you.  It's ultra unrealistic looking.  I tried out lipstick colors, and it didn't even overlap me lips.  It tried to, but there was on predetermined lip "shape" that is superimposed over my mouth.  It looked kind of like a child's crayon drawing.  There's also the Makeup (what the difference is supposed to be beats me) and Nails versions, but this was so bad I deleted them without even trying them out.

2. My Beauty Bible: 1 Star.  At first, I thought it looked really professional and user friendly in its layout. I was excited, but the free version is almost useless.  There are only five videos, seven photos, and I didn't bother counting the text tips (which were ridiculously basic).  They also make another app (which I didn't realize until I opened it, and it was almost identical) called How To Do Your Makeup Professionally.  There were even LESS videos supposedly in the paid version than My Beauty Bible.  And they aren't even professionally produced photos by actual makeup artists.  They are imported videos from YouTube.  Why people would PAY to have access to these when you can see them for FREE on YouTube is beyond me.  Color me annoyed.

3. BarryM Looks: 1 Star.  I was excited to see this, because I've heard such good things from other YouTuber's out there about the BarryM products.  Having seen them in action, I thought they looked to be great quality.  Apparently though, that doesn't translate to their app quality.  It looks like a 6th grade powerpoint presentation, with outdated graphics.  The videos have no voice and are very ameteurish with low quality resolution and lighting.  It's ok if you want to see how the products work, but they even show the quality of the products off well at all.  It looked like bad Wet N' Wild makeup from 1989.  They look super cheap.

4. How To Make Your Hair Look Fab: 1 Star.  By the makers of My Beauty Bible.  Enough said.

5. Mark.trends: 2 Stars.  This app is basically an ad for their new products.  Like an Avon catalog with 8 pages you flip through on an iPad.  You can get through it all in a matter of minutes.  But I gave it an extra star, because it does look really nice and professional.  Just with there was some interactive elements to it that made it engaging!

The Winners-

1. Beauty School by Typef.com: 4 Stars.  This app is great for beginners at makeup!  You input your personal traits (like hair color, skin color, skin type, etc) and select mini courses to show you basic application techniques.  You get written step by step instructions, videos, and product recommendations.  It's like all your basic beauty articles from a magazine in one place.  I recommend it if you are looking to start wearing makeup everyday (for work, etc) and need some guidance, or for young girls just starting to experiment passed lipgloss and mascara.

2. Beautylish: 5 Stars.  The winner by far, I love this app.  I've started using it a bit more on my actual computer through the website, but it allows me easy access to my account when I would rather work from the couch!  You can upload your own videos and connect to your YouTube account then link to the products you used.  It gives your audience instant buying power!  There's an online retail store, so they can purchase everything there all at once.  It's great for those people who don't want to have to search everywhere for the products used in their favorite tutorials.  You can also write and read reviews on hundreds of products, and there are awesome forums where you can chat with makeup and beauty enthusiasts from all over the globe!  Plus, you get $10 store credit for joining.  All for FREE.  (Keep in mind though that the credit is good for only 48 hours.)  I've already had a great time connecting with people and sharing my opinions.

The Contenders-

1. Celebrity Makeup Looks: 3 Stars.  It's basically full of YouTube tutorials featuring how to's on celeb looks.  Again, another app trying to feed off of YouTube's gurus to create their product.  The ads at the top of the page are distracting from watching the videos, and there's no way to get rid of them.  The description bar doesn't open fully, and you can't read much at all.  However, there are links that connect you to that guru's YouTube account, so you can subscribe and watch their videos through YouTube at a later time.  It's a decent concept, narrowing down the focus of the videos into one place.  But again, it's really just using the work that YouTube has done to create it's own app.

2. Bloom Beauty Trends: 3 Stars.  This is a good place to promote yourself or finding a professional near you, but I didn't see many members near me. I can see this becoming a big thing in the future, as more pros join and it becoming a great resource.  But it's really no more useful than YouTube itself.  You can find someone's profile and see their tutorials and education/references in one place though.

Do you have any favorite beauty apps that you'd like to recommend?  I'd love to hear about them!  Please leave me a comment below!

Thursday, March 28, 2013

Essie Nailpolish- First Reaction and Spring Color Swatches

Ever have one of those days where it seems like the clock is playing tricks on you, and it's ticking by so much quicker than you thought?  Today has been one of those days, so I apologize this post is coming so late!  At least I got it in before midnight, so that counts for today, right?

I think I'm the only woman on the planet who has never used the Essie nailpolishes before.  I seen them in magazines everywhere, and I'm always drooling over the colors.  Something about seeing the color dripping all over the white handle of the bottle always makes them look so amazing!  Yet every time I've gone to Target for polish, I've skipped over them for some weird reason.  Maybe it's because I wasn't supposed to use them for the first time until it was time for me to do a review on them.

Yesterday I decided that in addition to doing makeup reviews, I'm going to also review nail polish colors for my favorite makeup brands and the new lines of the big guns like Essie, Opi, China Glaze, etc.  What better time than at the beginning of spring, when everyone is priming up to get their tooties ready for sandal weather? (IF it ever gets here!)

essie nailpolish spring collection avenue maintain
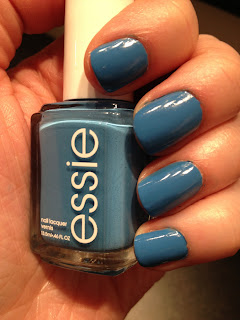
Avenue Maintain- looks a little more teal in this photo due to lighting.  The swatches below with a white background give a more accurate depiction.  The color is a bright mid-tone blue, bordering on Robin's Egg Blue.


My first reaction: OMG!  I used the color Avenue Maintain to paint my left hand for an image of me holding the bottle, and I couldn't believe how creamy and pigmented it was!  I'm so used to the colors in the bottle being so vibrant and rich, and then the color going on sheer and needing a couple coats to achieve the look it has in the bottle itself.  Not so with Essie!  In fact, every color I applied to the swatches only needed a single coat.


I didn't get all of the new colors.  I do have kids to feed, too! haha.  But these were the ones that really stood out to me.  I guess I'm in a big blue phase right now, because in addition the the three pictured here, I also got one from Orly.

In order: 
* Hip-Anema- A GOREGOUS bright coral color. I can't wait to wear this this summer.
* Bond With Whomever- A soft lilac with enough warm undertones that I don't look like a corpse with my fair winter skin. perfect for Spring with all the pastels on the market right now
* Bikini So Teeny-  Another pastel, this is a chalky light blue.  I can totally see this as the perfect pedicure color for bridesmaids!
* Avenue Maintain-  The beautiful mid-tone blue I painted on my nails.  Looks much darker in this photo than real life.  (sorry for the crappy iPhone photos!  My camera didn't want to focus so close up.)
* Butler Please- The perfect summer blue.  Reminds me of the tropics.  Again, looks a bit darker on screen than in real life.

Even though two of these are more "summer" to me than "spring", I think these colors are a total hit, and I look forward to buying more in the future.  I'd definitely recommend them!  The big test for endurance will come from tomorrow's photoshoot I have in the morning, and we'll see how the color lasts into next week.  Since I only have my left hand painted right now (and I'm too lazy to get up early tomorrow morning to do it before I leave), I may end up taking it off and re-doing it for endurance at a later date.

Disclaimer: As with all my product reviews, I was not paid by the cosmetic company to provide feedback or review/promote their products.  I purchased these products with my own money at my own discretion.  All the opinions expressed in this article are my own.

Wednesday, March 27, 2013

Follow Me with Bloglovin'!

While searching online for new blogs to follow, I realized that my Google Friend Connect wasn't working, and I never was one much for the feed reader anyway.  I like to follow my blogs through Facebook.  Most blogs have some kind of linking system that automatically posts to their Facebook page when a new blog is up, and I see that in my regular feed. I can choose to go in and read it, or I can choose to bypass it.

But now that I'm consistently blogging myself, and I really want to immerse myself in the community, I figured it was time to find something else new that works.  Enter BlogLovin'.  I saw a cute little icon on someone's blog, and after clicking it was taken to the BlogLovin' site.  This to me is the perfect answer for my situation!  I can download the app for my phone (which I have!) and get access to all the blogs that I follow.  Or, I can log in through the web browser on my iPad and see their posts.  Best yet, when I've read something, it dims the post on my list so I know I've already read it.  And it gives me an icon of how many recent posts by that author I haven't read yet so I don't waste time going to blogs that haven't updated anything lately.

Plus, you can use it's handy search bar to find blogs to follow that already use the service!  Genius!  I've already found a TON of great new makeup blogs and beauty blogs to follow.

Here's a screenshot I took with my phone.  It was all I could get that had the logo in it.


If you haven't checked it out yet, I highly suggest you do!  Simply click on the icon on my sidebar or the link below, sign up for a free membership, and you can start keeping all YOUR blogs in order, too!

Follow my blog with Bloglovin

Tuesday, March 26, 2013

Product Review- Smashbox Fusion Soft Lights

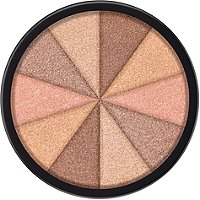
I've been using the Smashbox Fusion Soft Lights for a few years now, and I really love them.  I have both options in my kit, although I find that I use the Baked Stardust much more often than the Baked Starburst (pictured below).  They are very versatile products, because you can get a different color blend by rotating the compact so that you are blending three of the triangles of color at a time.  You can customize the color to your skintone, whether it's more fair or more tan.  I use these to highlight the skin, as they have a soft satiny shimmer to them and aren't frosty or glittery.

I had to take a photo with my iPad of the lighter one since I couldn't get an image for you online anywhere.  Sorry it's a bit crappy.  But you get an idea of the lighter tones it includes.


Baked Stardust:  This is the one I use most often since I deal primarily with lighter skinned clients.  Not sure why that is, but it just seems to be the people sitting in my chair aren't big sun worshipers or darker ethnicities.  But the colors on this compact are white, champagne, and pink tones, then a lighter bronze and a darker bronze if I do have a darker client.
Baked Fusion Softlights


Baked Starburst:  This one is best for those with darker skintones.  It's a variety of bronzey shades that really highlight and glow up the skin.  It's also great for a bronzing powder for lighter tones, too.
  
Disclaimer: As with all my product reviews, I was not paid by the cosmetic company to provide feedback or review/promote their products.  All the opinions expressed in this article are my own.


Monday, March 25, 2013

What's On My Beauty Bookshelf?

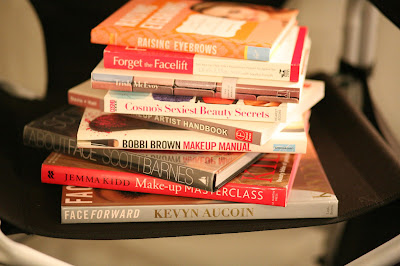
Every great makeup artist has to start somewhere.  Whether we are formally educated in a school or learn on our own, we need some kind of reference manual or guide to show us techniques and products and anatomy.  For some it is videos on YouTube.  For others it's articles in a magazine.  For me it was books.  Glorious books.  Maybe that just dates me as being in the over 25 group, but I've always had a love affair with books.  Something tangible I could hold in my hand, turn the pages, and lounge with by the pool on a lazy summer day.

My very first book was by Kevyn Aucoin.  Making Faces.  It was the epitome of makeup tutorial books, and I spent hours in my bedroom as a teenager emulating his techniques for applying makeup to transform the face. My face.  It was the foundation for my views on beauty and makeup, and I find myself longing for that copy I had so long ago.  Perhaps some day I will purchase a new copy, but for now its teachings remain safely nestled in my brain.  At least I still have my copy of Face Forward!

Here are some of the books I have on my beauty bookshelf right now that I love to pull as reference when I am working with a client.  Or even just for days when I want to brush up on their pearls of wisdom.  Either way, {some} have provided me with a fountain of knowledge over the years {while others I've recently picked up and put back down again}, and I hope that you can find some inspiration to transform your beauty routine as well!

beauty makeup books

Face Forward by Kevyn Aucoin
By the beauty master himself who inspired me to become a professional makeup artist, this book shows you not only amazing step by step instructions for full face makeovers, but insight into his life and relationships with some of today's hottest stars in Hollywood.  I am still amazed at the transformations he creates in this book, and his steps are both comprehensive in explanation and easy to follow.  A MUST HAVE for anyone who loves makeup!

Make-up Masterclass by Jemma Kidd
A former model, Jemma Kidd brings her perspective to the makeup artist world with a pretty good book for every day makeup wearers that want that next step in their application techniques.  I read this pretty far into my career, so I didn't find too much new information for my own repertoire, but I highly recommend it for consumers.

About Face by Scott Barnes
You see the YouTube videos everywhere on how to look like Kim Kardashian and J. Lo.  Well, Scott Barnes is the guy who created their signature looks with his highlighting and contouring techniques he describes in his book.  This has completely revolutionized how I apply cream foundations on my clients, and I love his techniques for adding shading to the skin prior to the foundation application.  This book really pulled together for me the methods only briefly described in these "tutorials", and I love the way it's looking in my own work.  A MUST HAVE for the professional makeup artist that really wants to take their foundation application to the next level.

Bobbi Brown Makeup Manual: For Everyone From Beginner To Pro
I think the title is a little misleading for us professional makeup artists out there.  I think it's really geared more towards the "beginner" end of the spectrum, which is why it's one of the first books I reach for when doing one on one consultations with my clients for "homework" reading.  I adore Bobbi Brown and would love to own all of her books some day, so I'm very happy to recommend this to anyone who loves a good beauty book.  But for those out there already making a living as a freelance makeup artist, don't expect too many pearls of wisdom on the application front.  There is however a great section in the back on careers in the industry, as well as a FANTASTIC reference for top makeup brand facts!

The Makeup Artist Handbook by Gretchen Davis and Mindy Hall
Once I knew I wanted to make this my full time career, I went straight out and bought this book.  I read it from cover to cover on my breaks at the Macy's makeup counter, hunched over my cup of chicken noodle soup from Au Bon Pain, slurping up chunks of french baquette soaked in broth along with my knowledge.  I think I initially bought every recommended product in this book, which touted them as the "industry standards" before learning to experiment and develop my own sense of style and what products worked best for me.  It teaches the fundamentals and science behind so much of the industry, I think it's an invaluable tool for those who want to work on production teams and sets of any kind.  It has a wealth of wisdom for set etiquette and proper procedures which can help make or break your career.

Cosmo's Sexiest Beauty Secrets  by The Editors of Cosmopolitan
I actually just picked this up from the used book store last week on a whim and found it cute.  Definitely for the everyday makeup wearer looking to find a new trick or two, or to step outside their ho hum daily routine and spice things up a bit.  Pretty much every tip in the book has been discussed ad nauseum by Comopolitan in their articles over the years, so if you're a long time reader of their magazine like I am, don't expect any new surprises.  A good, quick, light read though!

The Power of Makeup by Trish McEvoy
Got this last week from the used book store as well.  Read about a quarter of it and had to put it away.  I found this book more of a personal history for her and her brand, as well as a creative marketing piece for her products.  Perhaps I'll pick it back up again some day and finish it, but for right now I'll reach for my other "go-to's" first.

Forget the Facelift by Doris J. Day
This book is really great for those who have skincare issues they need to resolve.  A dermatologist with a thriving (as least it sounds like it is from her book!) practice in New York, she breaks down the way the skin works and the internal and external factors that play a part in it's health and aging process.  If you want to look younger, following her tips should really show improvement for you.  I love that she focuses not so much on the procedures and products, but the holistic skin care recipes and  spiritual aspect of inner peace to limit stress and reduce the aging process.  I'm looking forward to experimenting with her recipes and sharing my experiences with you!

Raising Eyebrows by Cameron Tuttle
I got this book super cheap last year at IMATS in NYC from the Benefit booth when I made a purchase.   I got a few copies and gave them to the artists on my team.  I've always been a brow girl myself, so I didn't really learn anything I didn't know per se, but it was a fun and interesting read!  One of my makeup artists, however, says that it's totally changed how she sees brows, so I'd highly recommend it to anyone who really wants to learn the perfect techniques for gorgeous eyebrows.



Friday, March 22, 2013

Product Review- Benefit Hoola Bronzer

If there's one thing that Benefit does right (and they do a LOT of things right) it's branding for their products.  From the adorable names to the super cute packaging, they make makeup shopping fun and ultra girly.  Their Hoola bronzer is no different.  It comes in a little box with it's own brush, and even the name conjures up images of lounging on a beach- exactly what a bronzer should do!  There's even a little mirror inside the lid so you can see where you're applying.  I like that the box is cardboard, so it's relatively lightweight and "crush" resistant.

For my skin tone, it's too dark to use as an all over bronzer without looking like I was outside making mud pies with my sons, but it does work really really well as a contouring shade.  I haven't had the opportunity to use in a dark skintone to see how well it shows up, but you can find tons of video reviews on YouTube featuring women of all ethnicities.

Copyright Benefit Cosmetics. Image from the Sephora website.


It's a really nice matte finish, which I love.  Bronzers with shimmer used all over the face can come across a bit disco-ball if you're trying for "color".  So as a contour product, it's right up there with my all time favorite- Too Faced Chocolate Soleil Bronzer.  If it smelled like the tropics, I'd almost rate it a #1 in my book.


Disclaimer: As with all my product reviews, I was not paid by the cosmetic company to provide feedback or review/promote their products.  All the opinions expressed in this article are my own.

Thursday, March 21, 2013

Product Review- Stila Long Wear Liquid Lip Color

I'm all about the product reviews this week I guess!  Time to do another one, and this time it's about lip color!  The newest product on my lips I'm loving is the Stila Long Wear Liquid Lip Color, specifically in Caprice.

Copyright Stila Cosmetics.  Image from their website.


I bought a set of four colors back in November when they had their holiday sets out, and if you shop through their website, www.Stilacosmetics.com, you can still find it.  I hope it sticks around for longer so that more people can snatch these up.  They've pre-launched three colors in their Stay All Day formula, but none of the colors they have or are intending to have match the ones in this particular set.  I'm looking forward to trying them out on April 6th at IMATS in NYC.  I've got my fingers crossed that they'll have all of their colors there for me to play with and purchase.

I've got a video up on my YouTube channel with my review of this product, too.  So be sure to stop by and check it out.  Be sure to subscribe my channel and like the video while you're there, too!  It's free, and I'd appreciate the support!

But moving back to the product....  After filming a tutorial on Looking More Awake, I took a quick Instagram pic of my makeup look and uploaded it to my personal Facebook.  I've never had a photo get so many likes (on Facebook at least) from my friends and family.  They LOVED the bright fuschia shade on me, and I've worn it almost every day since.

There is a downside to this product though.  It's so intensely pigmented that if you put it on straight from the wand without wiping some of it off, it will look really cakey and almost chalkey on your lips.  I have to put on a sheer layer of it, and that's still no where even within the definition of "sheer" in terms of color payout.  It does dry down to a matte finish, and I'm a fan of glossy looks, so i prefer to wear it with some Revlon gloss over the top.  It does mean that it doesn't actually wear that long.  Every time I took a sip of something to drink there was lip color on my glass.  But the pigment stained my lips and stayed bright for hours, so it's a trade off.  It didn't dry out my lips at all, and the smell is just divine.

Overall, I give this product a huge thumbs up, and I'm hoping that the new formula is just as awesome.  The other colors in the kit are nice, too.  The Muse shade is a gorgeous soft rose color, and I'm fairly certain I'll be wearing it a bunch this spring, so keep an eye out for it in my tutorials.


Disclaimer: As with all my product reviews, I was not paid by the cosmetic company to provide feedback or review/promote their products.  All the opinions expressed in this article are my own.

Wednesday, March 20, 2013

Product Review- L'Oreal True Match Lumi Foundation

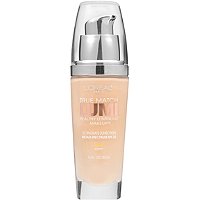
In my effort to expand my drugstore horizons, I picked up L'Oreal's True Match Lumi Health Luminous Makeup foundation at Target the other day, because I heard that it's great for dry skin.  I'm a big fan of most of L'Oreal's products, so I figured I'd give it a whirl.  I chose the color Porcelain~Light Ivory W1-2 Warm (could they make the name any longer/more complicated?), and it's a really good match for my skintone.

I've been pleasantly surprised by this product, although I don't think I'll be switching over from my prestige brands any time soon.  But when I only need to wear foundation for a few hours and don't want to "waste" my more expensive brands, this does the trick nicely.

The coverage was pretty good, but I did find it soaking into my beauty sponge quite a bit even though the sponge was damp. I was able to build up the coverage after using about 5-6 pumps of the foundation.  Keep in mind though that I'm not a huge fan of my freckles and like a heavier coverage in my makeup.  For those of you who have great skin and like a medium coverage, I think you'll love the effect this has on your skin.

This foundation didn't oxidize on my skin and darken, as some fair colors can do.  I'm a tricky color to match.  My skin is very fair, but my freckles are just enough to make it appear darker than is necessary.  I was able to guess from the bottle on the first shot and score a shade that looked great on my skin when I applied as well as a few hours later.

It felt pretty hydrating and creamy on my skin, and it left a nice glowy finish that wasn't too shimmery.  It has a good skin-like finish overall.  It did settle a bit into the pores around the sides of my nose, and cling to some of the drier patches.  But I think that if I'd exfoliated a bit better and used a different primer, that issue could be resolved.  I know I'll be reaching for this again in the future, so hopefully I'll have better feedback after more uses.

True Match Lumi Healthy Luminous Makeup

Disclaimer: As with all my product reviews, I was not paid by the cosmetic company to provide feedback or review/promote their products.  All the opinions expressed in this article are my own.

Tuesday, March 19, 2013

Product Review: Maybelline Instant Age Rewind Eraser

I'm not a fan of drugstore foundations or concealers.  Let me just put that out there.  Typically, I'm not a fan of blush or eyeshadow by drugstore brands either, but over the years a few have won me over.  There are some brands I know I can run to a Target and pick up something in an emergency or on vacation and get great results, and there are brands that you will NEVER find in my makeup bag or professional kit.  But every once and a while, I'll see something on so many YouTube videos that I figure that many people can't be wrong.  This is one of those times.

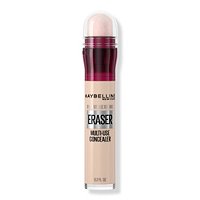
Instant Age Rewind Eraser Dark Circle Treatment Concealer


I watched a few videos where the artist used the concealer straight from the application to highlight in a triangle shape under the eyes, and I thought "Hmmm, not a bad idea, but that sponge must be full of germs now!"  Then I looked more into the product, and it is supposedly treated with something to inhibit the growth of bacteria on the applicator.  I decided to give it a try and have really liked the results.

I used the color "Light", and since I'm already so fair it didn't do much to lighten and brighten that area like the other YouTubers got, but it did cover my circles.  I don't think I use it on a regular enough basis to see any treatment benefits from it, but it's not a horrible buy.  My first impression was total love, but I've been using other concealers in my repertoire for videos and remembered why I love the higher end brands to begin with.  But for babes on a budget, I give it a two thumbs up!

Bonus: It's convenient to toss into my purse for touch ups later in the day, but the fact that I feel I need to touch it up is a downside.

Disclaimer: As with all my product reviews, I was not paid by the cosmetic company to provide feedback or review/promote their products.  All the opinions expressed in this article are my own.

Monday, March 18, 2013

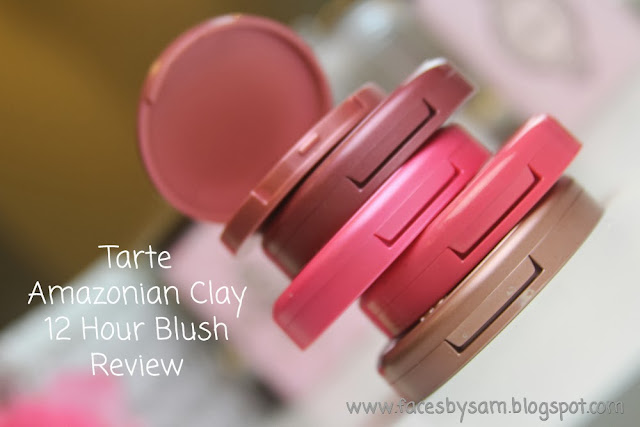
Product Review- Tarte Amazonian Clay 12 hr Blush


Tarte Amazonian Clay Blush Review


Amazonian Clay 12 Hour Blush


From the company:

A long-wearing, supremely soft blush infused with Amazonian clay harvested from the banks of the Amazon River and naturally baked by the sun.
Product Performance: This 12-hour blush universally benefits all skin types for a fade-free, flawless finish in shades ranging from soft to vivid and matte to shimmer to suit a wide variety of skin tones.
Powered By: Amazonian clay minimizes oil in and around pores to balance skin and keep product in place while also hydrating the skin naturally to restore moisture, reducing the appearance of dry, flaky skin.

And now for my $.02:

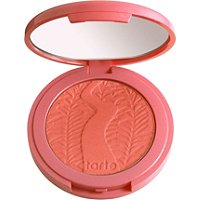
Let me start off by saying, nobody from Tarte paid me or asked me to do this review.  I bought their Amazonian Clay 12 hr Blush in Blushing Bride last fall all on my own, with my own dollars.  I bought another kit from them that had a travel size of a color called Adventurous (which I will cry when I run out of b/c they don't sell it on it's own!).

Copyright Tarte Cosmetics.  This is a screenshot from their website of the Blushing Bride Color.


That disclaimer out of the way... I LOVE THIS BLUSH!  I really love the Adventurous color a lot better than the Blushing Bride color, but it's still a really great product and can be totally wearable even on my super pale skin.  When I want a more mauve/wine based color for a bit more drama, or I'm wearing cooler tones for my outfit and makeup but don't want to reach for a really Barbie-pink color, the Blushing Bride looks great.  I love how it has some soft golden shimmer to it.  However, Adventurous is way more my speed- the perfect blend of peachy pink with a non-glittery glow.

Amazonian Clay 12 Hour Blush
Click to shop

The 12 Hour Claim:

I find that this product goes on beautifully and really holds up to it's claim of 12 hours of wear.  It actually lasts longer than that on me, as I am often putting on my makeup in the wee hours of the morning for weddings and hitting the hay after midnight.  Can't say I'm totally stunning at that witching hour, but it's definitely better than 12 hours.  I do wear a high quality foundation (most times over a high quality makeup primer like Makeup Forever HD Primer), so I'm sure that helps with staying power vs applied over cheap foundation or just a powder.  No matter how good a product is, you have to give it something to grip to!

Copyright Makeup Forever from the Sephora website.


My favorite thing about these blushes, other than the fact that they wear so well, is that the case color matches the product color. Ingenious!  I don't know why more cosmetic manufacturers don't do this!  It's really such an amazingly simple idea, yet it makes it so nice for when I'm looking for exactly the color I want.

Watch my YouTube review video for more about why these blushes rock!  Looking to add some Tarte products to your makeup bag?  SHOP HERE and don't forget to sign up for their Pretty Perks program to earn great rewards for shopping online and FREE SHIPPING on orders of $40 or more!


Saturday, March 16, 2013

How To Contour And Highlight Your Face

For this tutorial, I used powder products to contour (add shadows) and highlight (bring forward) my face.  I like using powder products, because I prefer to set my foundation after applying with a loose hydrating powder.  My favorite is Smashbox Halo Hydrating Perfecting Powder.  You could use a cream or liquid product to add your contour and highlight prior to your foundation for a more natural look or after the foundation for a stronger look and then add your powder over the top.

Products Needed:

*Too Faced Chocolate Soleil Bronzer- a matte dark bronzer with a delicious chocolate smell!
*Stila Eye Shadow in Kitten- careful this color is very very shimmery so use sparingly!
*Real Techniques Contour Brush
*Real Techniques Setting Brush
*Crown Brush IB106 Angle Blush Brush- from their Italian Badger line

Step 1:
* After you apply your foundation (watch how I apply it with a Beauty Blender™ style sponge here!), concealer, and powder, dip your angled blush brush into the bronzer and apply it under the cheekbone from the back of your cheek forward. Stop it just below the apples of your cheeks.  Repeat on the other side.  (Check out the video to see how I hold the brush and how to find where the perfect placement for your contour shade.)

Step 2:
* Using your angled blush brush, apply the bronzer at the temples and along your hairline to give some dimension to your forehead.  This will make the center of your forehead look brighter without having to apply a shimmery highlight in your t-zone, which could make you look oily or shiney in photos.

Copyright Too Faced Cosmetics. Image from the Sephora website.

Step 3:
* (Optional) Using the setting brush, apply bronzer in a narrow line down the sides of the nose to make it appear thinner.  Be sure not to take it all the way to the tip of your nose, or it could look dirty.  Blend it out very well so it's just the hint of a shadow and not a dark obvious line.

Step 4:
* Swipe the contour brush over Kitten and tap the excess.  Apply the highlight over the top of your cheekbones from just before the temples to just over the center of the apples of your cheeks.  Do this for both of your cheekbones to highlight.

Step 5:
* Without adding any more product to the brush, swipe the brush in a "C" shape over the outer edge of your eyes to bring a touch of radiance to your eyes and really bring out this area of your face.

Step 6: 
* Use your setting brush to get a very tiny bit of Kitten on the tip of the brush and swipe it down the center of your nose and over the bow of your lip.  Make sure to blend away any edges with your fingertip so there is no obvious makeup here.  You just want it to catch the light a bit and add a glow, not a frosted stripe.

Step 7:
*  If you need to tone down any of your contouring or hightlighting, use your buffing brush to soften the edge with a bit of your face powder.

Step 8:
* Don't forget to add some color to your cheeks!  Even if you don't want a real "pink" or "peach" color to your face, you should use a blush to blend the area between the highlight and the cheekbone together.  You can always try a very nude color with a hint of brown to it for a very "no makeup" look, but honestly I prefer something with a touch of pink.  Nobody's face is completely devoid of natural flush, so eliminating it has the tendency to make it look very unnatural.

Tuesday, March 12, 2013

How to Powder Under the Eyes and Around the Nose

Keeping your concealer from creasing under your eyes can be a major headache for some people.  Not only do you need to find a product that doesn't move and still gives you the right amount of coverage, you can't go and ruin that by applying your powder incorrectly.  Even if you don't have the perfect product, knowing how to powder it can at least give you better staying power until you do find that perfect product for you.

Personally, I love the Maybelline Instant Age Rewind Eraser Dark Circle Treatment Concealer.

Then, I set my concealer with loose powder. Smashbox's Halo Hydrating Perfecting Powder is great because it works to hydrate the skin throughout the day, so it won't dry out your under eye and make it look more creased.  You can purchase both of these products at Ulta.  If you don't have an Ulta near you, the Maybelline products are available at any drugstore, and Smashbox is available both online and at Sephora.


Step by Step:

  1. After you apply your concealer to your undereye area- Take a two-ply tissue and peel it apart so that you are left with an even thinner piece of tissue, and then wrap it around your ring finger.  Use that finger to gently pat away any excess pigment and oils from the products.  Once the concealer has been warmed up by your body, the concealer can move, so this takes away an extra that can settle into the fine lines and look cakey.
  2. Dip your small fluffy brush into your loose powder and shake the excess off.
  3. Lightly run the brush under the eye area to add some of the powder to the concealer and set it into place.
  4. Lightly run the brush around the sides of the nostrils, upper lip, and your bottom lip to set any concealer you may have placed there.  The small brush will also allow you to target these smaller creases a larger traditional powder brush would miss.
Check out the video I filmed for my YouTube channel here!

Products used in this video were:

*Smashbox Halo Hydrating Perfecting Powder in Fair
*Real Techniques Setting Brush

Monday, March 11, 2013

How To Apply Foundation With A Beauty Blender Style Sponge

I never used to use sponges for anything other than applying moisturizer to clients before putting their foundation on.  I certainly never used them on myself, and I always saw them as a disposable product necessary only for sanitation needs in a professional environment.  Having worked for makeup counters for so long, I was a firm believer in applying foundation with a foundation brush and a foundation brush only.  Even after I discovered the world of airbrush makeup, I still put my own foundation on the traditional way day in and day out.

Then I discovered the "beauty blender style sponge".  The original is called the

Beauty Blender™.  It came out a few years ago, but I never paid much attention to it.  I got one as a gift from someone once and didn't even take it out of the package.  Through some industry friends, I found out about a generic version online from Qosmedix.com, and I decided to buy a few (since they are only about $2 a piece there) for friends and stick them in with the makeup gift baskets I'd made for them that Christmas.  I had an extra one laying around for myself, and this past October I tried it out for the first time.  I wasn't impressed.  But little did I know, I was using it incorrectly!  The most important thing to remember is to use it wet, and use it to dab the makeup on the surface of the skin!  It made all the difference in the world.  Now I don't use anything else to apply my foundation, and it's changed the way my makeup wears on my skin for the better.

Here's how I compare the "original" to the "generic" version:
* The generic version has an indent in the center of the egg shape which makes it perfect for blending and softening out the edge of your makeup around the jawline and smoothing down the sides of the nose.
* The generic version is available in either pink (perfect for girly girls) or black (which doesn't exactly hide the dirtiness the way you'd think).  Either color will have some staining that even the amazing original Beauty Blender™ sponge cleaner can't remove.  Once the sponge starts to break down and not work well, it's time to toss it, but with regular cleaning, you can reuse it over and over and over!
* The generic version is sooooo much cheaper!

Copyright Qosmedix.com Oblong Blending Sponge, Pink

Now for the Step by Step to applying your foundation with the sponge:


  1. Wet your sponge thoroughly with water, then squeeze out as much as you can.  The sponge will swell to twice it's size and give you ample surface area to apply your foundation with.
  2. Apply your moisturizer and primer to the skin and allow it to sink in.  In my YouTube tutorial, I used Ren Ultra Moisture Day Cream and Smashbox Photo Finish Hydrating Primer.
  3. Apply some foundation to the back of your hand and dip the flat "butt" of the sponge into the foundation.  I used Benefit's "Hello Flawless!" Oxygen Wow Liquid Foundation in Ivory.
  4. Start in the center of your face to the side of your nose and start patting the foundation onto the surface of the skin.  Work your way to the outside of your face, applying the foundation in areas where you need the most coverage.
  5. Use the pointed end to smooth out any edges under your eyes and around the nostrils and the indented side to smooth out the edge around your jawline and down the sides of your nose.
And there you have it!  Beautiful, natural looking foundation!  Be sure to watch my Tutorial on how to use the sponge as well as the other videos in my "Basic Face Series" on YouTube which covers getting the perfect canvas for your makeup application.  Don't forget to like the videos and subscribe to my channel to see more great tutorials and product reviews!

Tuesday, March 5, 2013

Back to Beauty Blogging

It's 10 pm at night, and I've been fiddling with my old blog for a few hours now.  I think I've finally gotten it to where I want to be, but knowing me I'll probably meddle with it some more in the coming months.  It's been a long time since I've even looked at it, considering I'd moved on from my personal makeup business to a merger of my bridal makeup side of things with a wedding hairstylist to form the company Bridal Beauty Associates.  That completely consumed the last two years of my life~ in a very good way mind you~ but now that I've made the decision to leave the world of weddings behind after a very intense five years at it, it's time to go back to my roots- makeup education.

When clients would come see me at the makeup counters, they could expect a full education on the products they were buying. Knowing the ingredients, their uses, and the very in's and out's of a product was my passion.  I loved passing that information along to my clients, because I knew that an educated buyer was more likely to continue to buy from me.  And let's face it, those makeup girls in the department stores... we LIVED on our commissions.

Even now, working with brides and their families, I get questions all the time from women asking for my favorite product recommendations.  I'll get a Facebook message from a bride I haven't spoken to in years asking for a good replacement for her Mary Kay lip scrub or a non-smudging mascara.  Even the makeup artists on my team seek me out for the nitty gritty on everything beauty under the sun.  They are all excited about heading up to New York City on April 6th for IMATS (International Makeup Artist Trade Show), because they know I'm the kind of girl to score big and pass along the savings where I can.

But now that I've decided to make this my last year doing weddings, and I've turned over the wedding blogging duties to my business partner on the BBA blog, I'll be dedicating my efforts to bringing my readers the inside scoop on not only the best (or worst!) beauty products on today's market, but also tutorials and insider access to my life as a professional makeup artist.  (If you look back through the archives, I've deleted all the posts pertaining to my old wedding business and left just the product reviews and other general information.  From here on out, there will be general beauty related information posted.)

And because every good blog post should be accompanied by a photo, here's a recent image of me working!  Enjoy!


Related Posts Plugin for WordPress, Blogger...